Halloween is only a few weeks away, which means that now is the perfect time to get out those Halloween decorations – or to make some yourself if you don’t have any! Whether you’ve got kiddos at home who love to get creative or you’re just itching to get your hands on some crafts, these 13 easy DIY projects will have your home looking festive in no time.
Drip Candles
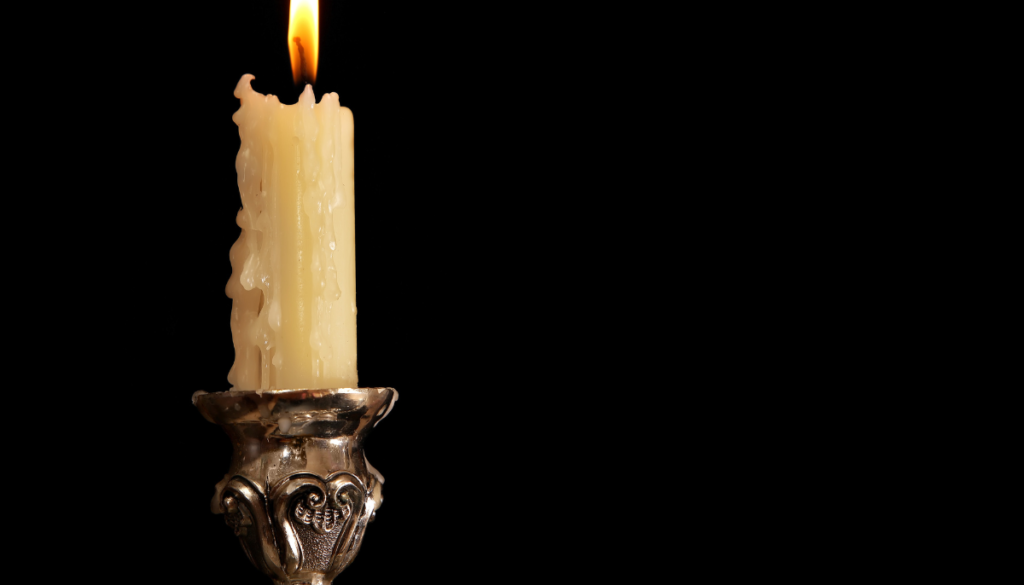
There’s something undeniably eerie about drip candles. Pick some up the next time you’re out, bring them home, and find a candlestick holder that’s spooky. Wine bottles are also a great option for holding these tapered candles. Light them, let them drip, and keep them around all season long.
Witchy Gourds
Here’s a way to make your produce cute and festive! You’ll need gourds and either googly eyes or white pompoms and pushpins, as well as black and orange felt for witch hats for this DIY project.
If you have googly eyes, stick them on the gourds to make a face. If you bought white pompoms (or you could try this with cotton balls), line up the pushpin so it looks like it’s the pupil of the eye, and then push it through the pompom into the gourd.
Make your witch hats with felt and hot glue (add an orange ribbon to a black hat and vice versa), then set the hats on top of your gourds for a cute Halloween display!
Traffic Cone Witch Hats
This DIY project only involves three steps! Purchase as many mini traffic cones as you like and have the space for. Buy black spray paint that covers plastic well and gold cardstock. Spray-paint the plastic cones black.
While they’re drying, cut any design you like out of the cardstock. A simple gold square with the center cut out (so it looks like a buckle) will look great, or you can be more creative. You can add a gold bow, a gold skull, a gold owl, a gold broom… think about what a witch would decorate her hat with!
Once the paint is dry, glue the cardstock to the cone. Your witch hats will add a festive touch no matter where you put them, but if you have floral wire or fishing line, try hanging them from front porch!
Pumpkin Owl
Here’s a really cute display that mostly uses objects you can find in the backyard! You’ll need two pumpkins, one smaller that’s shaped like a head if possible, and one for the body of the owl. This works best if you can find French heirloom pumpkins, which are sometimes called fairy pumpkins.
Find pinecones to serve as the owl’s eyes and use leaves for the eyebrows, beak, wings, and chest. Attach with glue, step back, and marvel at your cute pumpkin owl!
Bats, Bats, Everywhere!
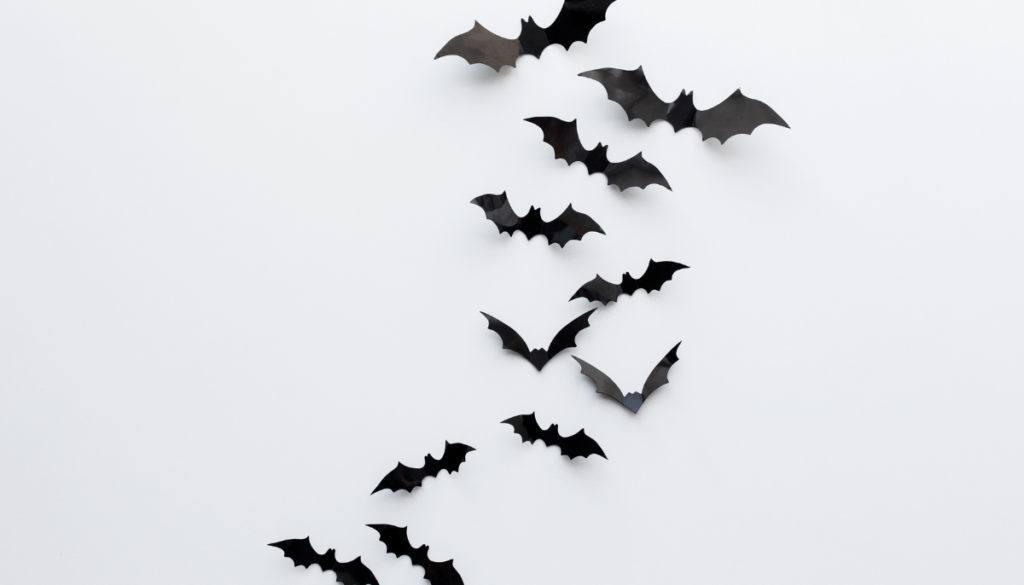
You’ll see bats a couple different times on this list because they’re so easy to make and they’re the perfect Halloween decoration! Find a template online for a bat shape, and then trace it on onto either black construction paper or felt. Add orange dots for your bat eyes and tape them wherever they look best in your home. They look especially spooky flying down the banister or across your fridge!
Jack-O-Lantern Candle Holders
Here’s an easy craft that’s all about using what you already have! All you need are clear candle holders, candles, black construction paper, and tape.
Cut jack-o-lantern faces out of the black construction paper, then tape each face to the front of each candle holder. No messy pumpkin seeds and lots of Halloween flair! If you don’t have candle holders, experiment (safely) with different jars.
Marigold Garland

If you have marigolds or are ready to buy some to make your home look and smell fantastic, then this is the DIY project for you! Even if you don’t have access to marigolds, you can make your own from red and orange tissue paper.
Trim your marigolds so that there’s still a bit of stem left. Then simply thread a needle and poke the thread through each of the stems. It takes some time, but in the end, you’ll have a gorgeous marigold garland that you can keep up all season. For Halloween, consider adding some fun ghosts to your garland!
Black Cat Sign
Here’s a great craft to do with the kiddos! Gather black, orange, green, yellow, and purple construction paper, along with a large piece of cardboard and glue. Cut the cardboard into the shape of a cat’s head (you can use an online template or freehand it), making sure the ears are nice and pointy!
Then, take the purple construction paper and cut it into two small triangles to go inside the cat’s ears. Then cut one more, wider triangle to place upside down for the cat’s nose. For her eyes, cut two long half-moon shapes out of the yellow construction paper. Place them upside down on either side of the nose. Then cut two ovals for irises from the black construction paper, and finally use a small yellow circle for the pupil, placing it inside the black iris.
The cat’s mouth is going to be a word! Choose your favorite Halloween message (I’d go with “Boo” or “Trick or Treat”) and cut the letters out of the orange and green construction paper, alternating colors. Or you can simply cut out the word “welcome” if the sign is going by your front door – it’s up to you!
Read More: Fun and Easy Fall Crafts for Adults
Pumpkin Banner
There are a ton of ways to make this one, but you’ll need two supplies: twine and something to make the pumpkins out of. You can go as simple as orange construction paper glued to cardboard or as complex as orange gingham checked burlap.
Measure your twine for the space where you want to hang your banner. Then, either draw a pumpkin shape by hand on a piece of cardboard and cut it out, or find a template online and print it off.
Count out how many pumpkins you’ll need to make your banner look its best. Then, place your fabric over the template and start cutting out your pumpkins. Attach them to the twine using a mini clothespin, or if you used cardboard pumpkins, you can hole-punch them and thread the twine through each stem. Consider adding twine bows to the pumpkin stems for a cute extra touch, or decorate them with jack-o-lantern faces.
Spooky Family Photos
Your mantel is the ideal place for spooky DIY decorations. Even if you don’t have a mantel, if you have shelves holding family pictures, you can easily make them spooky. All you need is black construction paper, a pencil, and scissors.
Get creative and cut out witch hats, brooms, and bats. Tape them to your family photos – that’s right, give your uncle a broom to sit on, or give your sister a witch hat! You can also tape the decorations directly on your mantel and shelves.
For extra spookiness, trace the silhouette of a face from a book or a family photo onto black paper, cut it out, and glue it to a doily that will serve as the frame.
Bat-Covered Front Door
Normally I don’t want bats hanging out around my front door, but that’s not the case during spooky season! Skip this one if your door is already black – there won’t be enough contrast to make this work.
All you need to do is take out that black construction paper again and cut out around 20 bat shapes. If you think large bats look spookier, cut out fewer shapes. Tape them in a pattern that makes it look like there’s a colony of bats flying across your door!
Candy Corn Bouquet
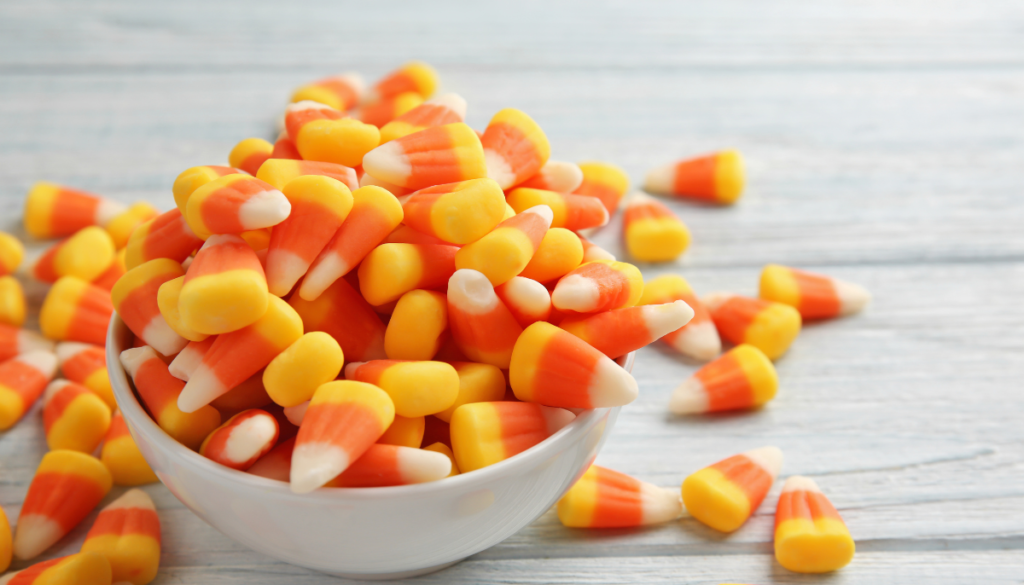
Here’s another front door decoration to welcome you home! The easiest way to make your candy corn bouquet is out of floral foam, but you can also use cardboard. Cut the foam into a triangle, and then use white, orange, and yellow paper to cover it up in traditional candy corn style. Turn it upside down to make it into a bouquet.
For the decorations inside the bouquet, you can stick faux flowers or dried flowers in autumn colors directly into the foam, or if you have some spooky decorations that you’d like to use instead, go for it! For the final touch, glue a plastic spider to the corner of your candy corn bouquet.
Hanging Witch Feet
You’ll need some witchy shoes (or boots!) for this one! Pick up some floral wire, a pool noodle (purple or green work great), witchy-looking tights, and grab those shoes from your closet. Cut the pool noodles to the right length to hang from your tree, then pull the tights over the noodles. Stuff them inside your witchy shoes, and secure them with the floral wire. Then, use more floral wire to attach the top of the noodle legs to a tree branch. You’re sure to scare the neighbors with this one!
Enjoy your DIY Halloween decorations for all of October, and find a good place to store them for next year!
Read More: Halloween Decorations to Make Your House Stand Out